How to Reduce the Workload of a Traditional CMM and Solve Bottleneck Issues
09.04.2019 -
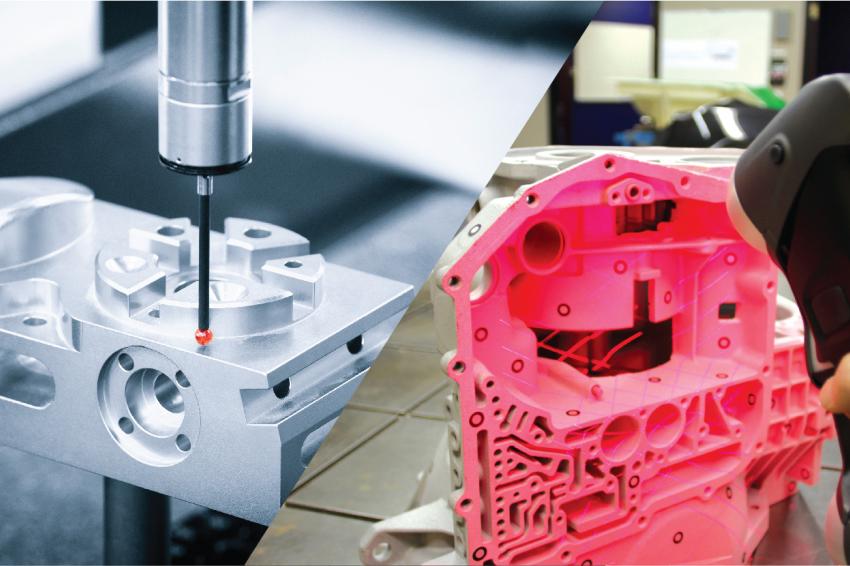
While CMM used to be the means of choice for quality inspections in earlier times, 3D scanning has become a valid alternative. Which option between buying a new CMM or opting for a portable 3D scanner offers the best return on investment?
Bottlenecks at the CMM are a real challenge for manufacturing companies. They face pressure to optimize their production process, which is slowed down by pending inspections at the CMM. As a result, there are delays in manufacturing and delivering parts, and customers suffer from these delays. In the past, of course, the traditional CMM was the only tool for performing quality inspections. However, as the technological landscape has transformed, new measurement tools that meet the high level of accuracy and resolution required by the industry have emerged. 3D scanning has not only reached a level of accuracy that approaches probing methods, but it also provides quality control with more data, more details, and more information, which allows for the inspection of more complex parts. Consequently, today’s industry experts now place their trust in 3D scanning and grant it a major role in quality control.
So, when dealing with bottleneck issues at the CMM, is it more profitable to buy a second traditional probing system or to get a portable 3D scanning device? This article aims to detail the costs and time associated with the functioning of a CMM and a 3D scanner. With these numbers in hands, we will be able to calculate the number of parts that can be inspected daily, to compare the time needed to program and operate the equipment, and, finally, to determine which of these options – A) buying a second CMM or B) getting a portable 3D scanner – offers the best ROI to reduce the workload of a traditional CMM and to solve current bottleneck issues.
Costs
First, the total costs associated with the acquisition of a second CMM are compared to those required for the purchase of a metrology-grade 3D scanner. Note that these amounts are listed in US dollars and that the analysis relates to the quality control performed on 5 models of car doors, in which 400 features must be inspected.
Purchase Costs
The CMM identified for this example has a purchase price listed at $ 200,000, while the price of a metrology-grade 3D scanner with comparable functionalities and measurement volumes is $ 100,000. In other words, the price of the probing tool is twice as much as the scanning tool. This difference is due to the CMM’s unique ability to measure tight tolerances with a high level of accuracy. Nevertheless, out of the 400 features to be measured on the car door, only 10 % require a tight tolerance, making the 3D scanner an alternative option for the vast majority of inspections.
Infrastructure Costs
Infrastructure costs must also be added, since a CMM requires a floor space of approximately 14 m² ($ 300/ m2 in an industrial environment) and must be positioned on a vibration slab, which costs $ 10,000 to install. Thus, $ 55,000 of infrastructure costs must be added to the purchase cost ($ 200,000) to house a second CMM. Meanwhile, the 3D scanner has no such costs, since the device is portable and can be stored in the most convenient free space.
Maintenance Costs
To make sure that both the probing and 3D scanning tools remain fully functional, a maintenance budget must be planned for calibration, hardware upgrades, and replacement parts. The annual calibration and maintenance fees for a CMM is budgeted at $ 3,000, compared to $ 5,000 for a portable 3D scanner.
Tooling Costs
The acquisition of an inspection tool, whether probing or scanning, is not limited to the device itself. A fixture tooling is also required to check features other than those measured directly with the inspection tool. This fixture enables QC to verify that the part assembles correctly on its counterpart, to check the presence of each and every hole, to measure their diameters, etc.
As a result, the critical points, such as the attachment points, are measured directly with the CMM, while the other points are validated with a checking fixture. Moreover, since this tooling is dedicated to a single model, as many checking fixtures as car models must be purchased (in this example, that’s five models at $ 20,000, totaling $ 100,000).
However, a checking fixture is not required for a 3D scanner. Instead, this equipment requires a holding fixture, which is more flexible because it does not need to be dedicated to a single model. Thus, even if a point or a position changes from one model to another, the holding fixture keeps the part in place, in the same position, regardless of the configuration. Consequently, a single holding fixture costs $ 4,000 for 5 door models.
Software fees have not been added to the cost comparison since it is generally the same data processing software that is used both in probing and 3D scanning.
Time
Second, the total time required to perform an inspection – from the technician training to the programming, measuring, data processing, and report generation – is compared whether the inspection is made with a probing or a 3D scanning tool.
Training Time
CMMs are complex metrology instruments that demand more training than 3D scanners. Specifically, operating a CMM requires a 4-day training and 3-4 months of supervised practice, while operating a 3D scanner requires a 2-day training and 2 weeks of supervision before an operator becomes completely comfortable with the device. Thus, if a company wants to acquire trained and experienced talent, it might have to pay an additional $ 10,000 in salary for a CMM operator, raising salaries from $ 40,000 to $ 50,000 based on a $ 20 hourly rate.
Handling Time
Quality controls in the automotive industry regularly involve parts of large dimensions. Moving those parts from the production floor to the laboratory takes time – an estimated 30 minutes per part – and requires two technicians to perform the task. However, this handling time is not required with a portable 3D scanner, since it is the inspection tool that goes to the part rather than the other way around.
Setup Time
Rigid measurement setups are essential to get accurate measurements on the CMM. Parts must be carefully fixed and positioned in order to enable operators to make measurements. The time to set up a CMM can be estimated at 15 minutes, compared to 5 minutes with a 3D scanner.
Programing Time
With a CMM, creating a program means establishing the probe trajectories for each feature, taking care to circumvent apparent obstacles. Thus, to measure 400 features on a car door, programing the CMM may take up to 5 days, while no programming is needed with a 3D scanner, since the trajectory followed for data acquisition is as simple as manual spray painting.
Measuring Time
With a CMM, the measuring time to get the full layout (400 features) is 4 hours. With a 3D scanner, the measuring time takes 30 minutes. However, 10 % of the features – those with high tolerances – must be measured with the CMM. Therefore, measuring these 40 features on the CMM will require 4 hours of programming and 25 minutes of extra measuring time, bringing the total measuring time to get the full layout to 55 minutes. In both cases, 100 % of the features are inspected.
Consequently, considering only the measurement time, 4 parts can be inspected per 8-hour shift with two CMMs, or 8 parts can be inspected per 8-hour shift with the combination of one CMM and one 3D scanner.
Conclusion
CMMs are expensive metrology instruments that cost twice as much as 3D scanners. In addition, more time and money are needed to operate them. Therefore, it is strategic to dedicate only the most important and delicate inspections of high-tolerance features to the CMM and redirect all remaining controls to alternative equipment, such as a 3D scanner. This action not only saves on the acquisition cost of the second CMM, but it also helps to accelerate simple and daily inspections.
In addition to being cheaper to purchase, 3D scanners also measure faster and require less training, handling, and programming time. As demonstrated, the combination of a CMM (dedicated to inspections with high tolerances) and a 3D scanner makes it possible to measure twice as many parts in the same work shift. As a result, with the purchase of a 3D scanner, less specialized resources are required, less time is spent on each part, and less money is spent on the technology.
This analysis demonstrates that the purchase of a metrology-grade 3D scanner, which will complement the current CMM, is the best solution for offloading the CMM by reserving it for the 10 % of features that require critical accuracy. The 3D scanner enables QC to save both time and money while gaining efficiency and flexibility. This is how the alliance of the two technologies provides the best return on investment for quality control.


